General IT Help
Printers, Network Drives, and other items not covered in other sections.
- How to Retrieve and Set Up the OWL and/or Laptop
- How to Install the Konica Minolta Printers
- How to Find and Use the Pharmacology Internal Webpage
- How to Scan to Email with the Konica Minolta Printers
- How to Use the Pharmacology Equipment Reservation System
- How to Report Spam and Phishing Emails
- How to Use SharePoint as a Shared Drive
How to Retrieve and Set Up the OWL and/or Laptop
Note: The OWL needs to be reserved using the department's equipment reservation system, please see this article on reserving the OWL before retrieving it.
- The OWL and Laptop are kept in locker BM2-13 at the entrance to the labs in the north tower. These lockers are immediately to your right when entering the lab from the elevators (close to P18-6205).
- Use the code you received to unlock the padlock on locker BM2-13 and retrieve the equipment. (The code is emailed when you reserve the OWL). Re-lock the locker before you leave.
- Place the OWL on the conference room table between 3 and 8 feet away from the screen. Plug in the power and USB cables into the bottom of the OWL.
- Plug the power cable into a wall socket and the USB cable into the computer running the meeting.
- Start your meeting and make sure that the OWL is selected for video, microphone, and speakers.
- To show the meeting on the screen, connect the same computer to the projector with an HDMI cable or USB-C adapter (provided with the OWL).
- If you are using the departmental laptop, the generic username and password are labeled near the touchpad. If you connect to Wi-fi, you can also sign into this laptop using your University account. Please use the supplied charging cable since the laptop does not charge while in the locker.
- After your meeting/reservation is finished, please neatly pack the OWL back in the box and return the items to locker BM2-13 and re-engage the padlock.
How to Install the Konica Minolta Printers
The department uses tracking codes for prints and copies in order to fairly charge printer expenses in excess of $150 a year to the appropriate labs.
If you do not complete the tracking code step, you will not be able to print!
This guide is split into a Windows section and Mac Section.
-
North Tower: 140.226.99.12South Tower: 10.35.106.164
Windows Guide
Start by downloading the Windows Drivers files by clicking here.
Run the Installer
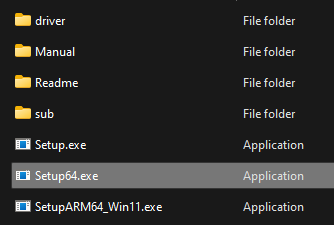
1. Once the download is completed, right-click the zip file File Explorer and select "Extract All," then press the "Extract" button on the pop-up. This will give you a folder named Windows11. Open the folder and double-click on "Setup64.exe"
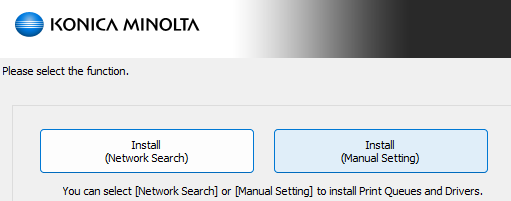
2. Check the "Agree" box and click Next when the program opens. Then click "Install (Manual Setting)":
3. The program will attempt to automatically find the printer, but won’t succeed. You need to click "Specify manually" choose the third option (IPv4,IPv6 Address), and type in the IP Address manually (see top of this document), then click "Next."
Before you can print on Windows, there are a few more settings to change. Go back to "Printers & Scanners" and click "Manage" for your printer.
Configuring the Printer with your Lab Code
Mac Guide
Start by downloading the Mac Drivers files by clicking here. (Or here if you are on MacOS Catalina or earlier)
You may not need to install these files if you have previously connected to one of the Konica Minolta 360i machines.
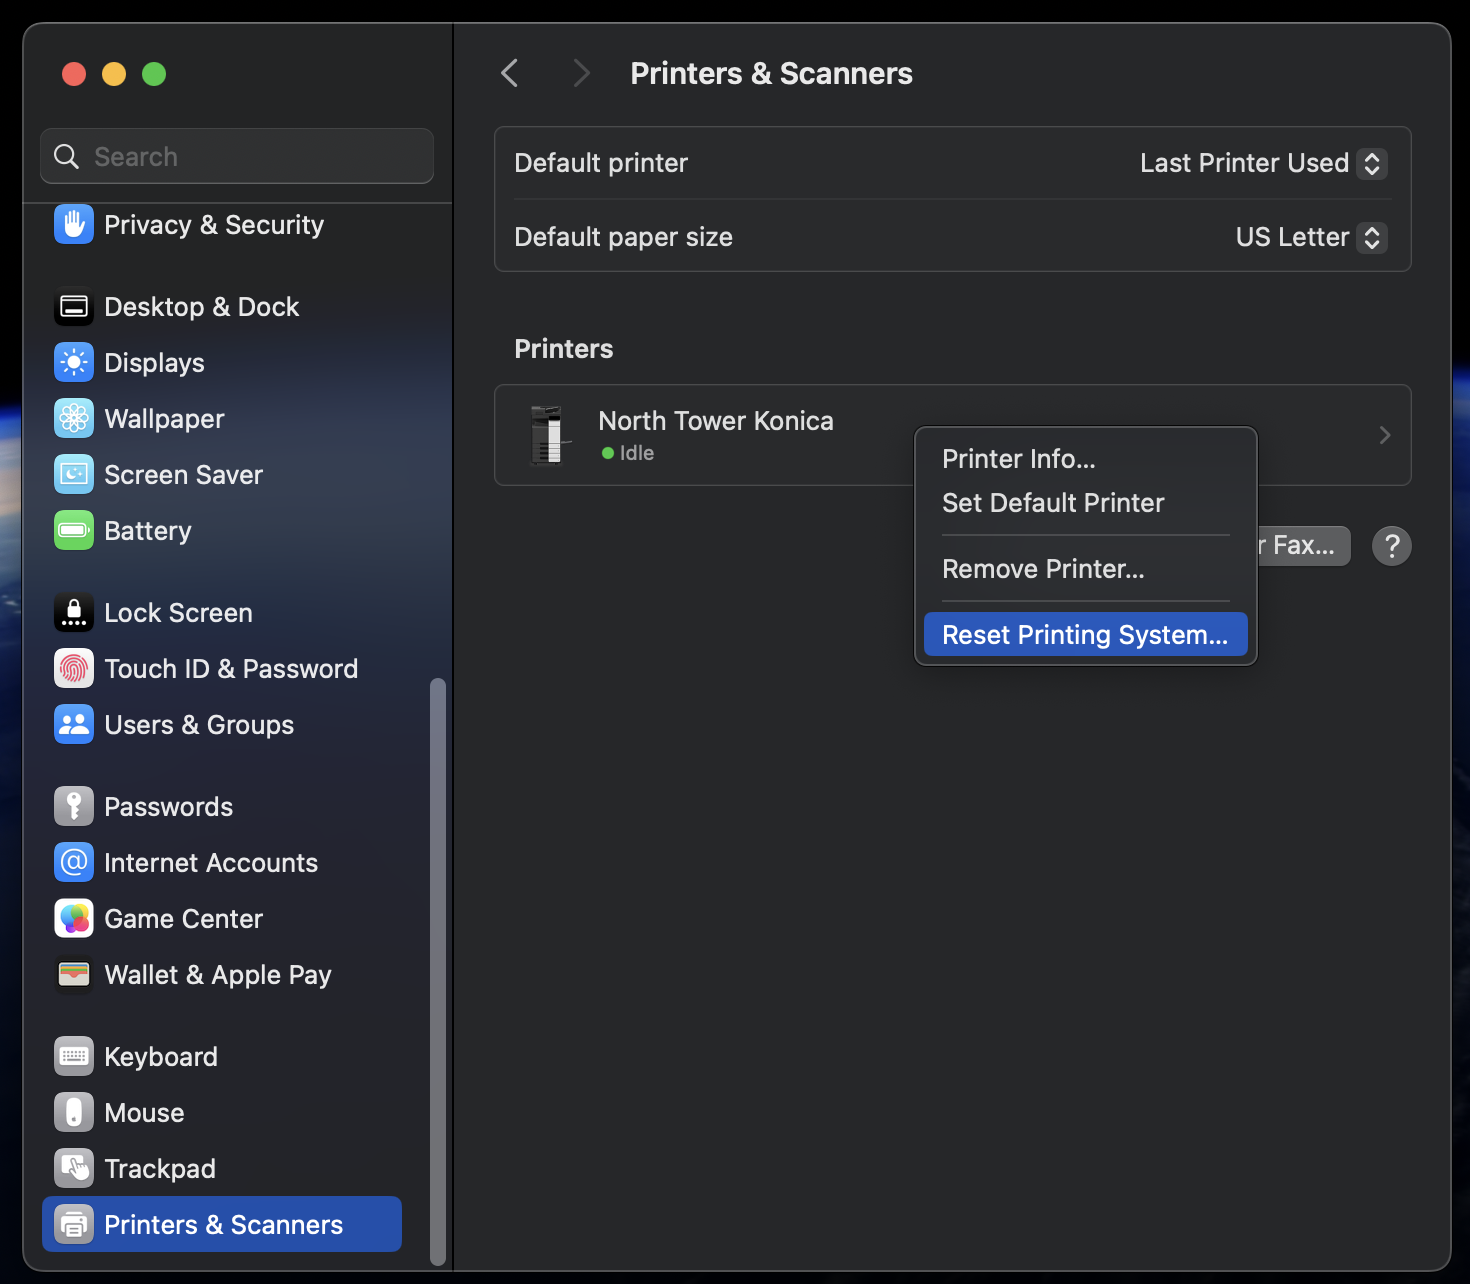
If your Mac has stopped printing after a MacOS update, you may need to reset the printing system and then follow the rest of the steps below. To reset the printing system, right click anywhere inside of the Printers & Scanners window and select "Reset Printing System" and confirm. Please note that this will remove ALL your current printers.
Installing the Drivers
1. Open the dmg file that you downloaded (Monterey link above) earlier, it should mount a drive called IT6: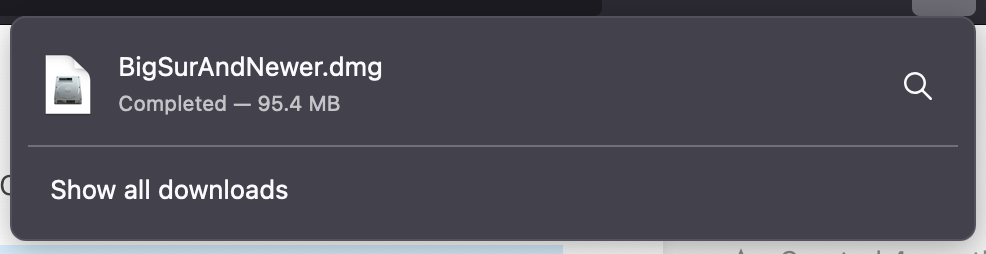
2. Drag the pkg file to your desktop and double-click it: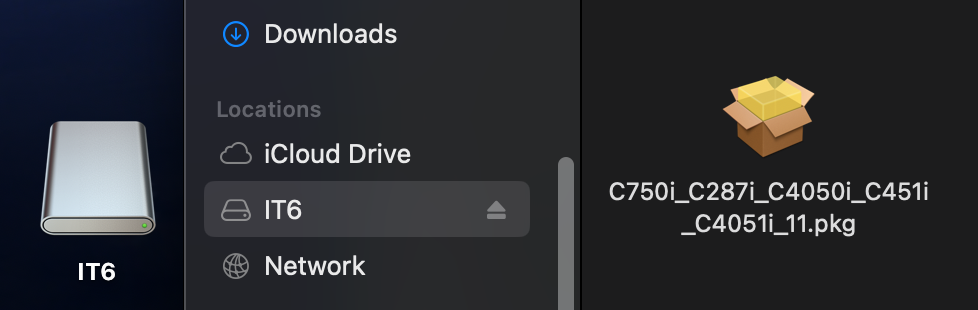
3. Leave all the default settings as you click through the prompts: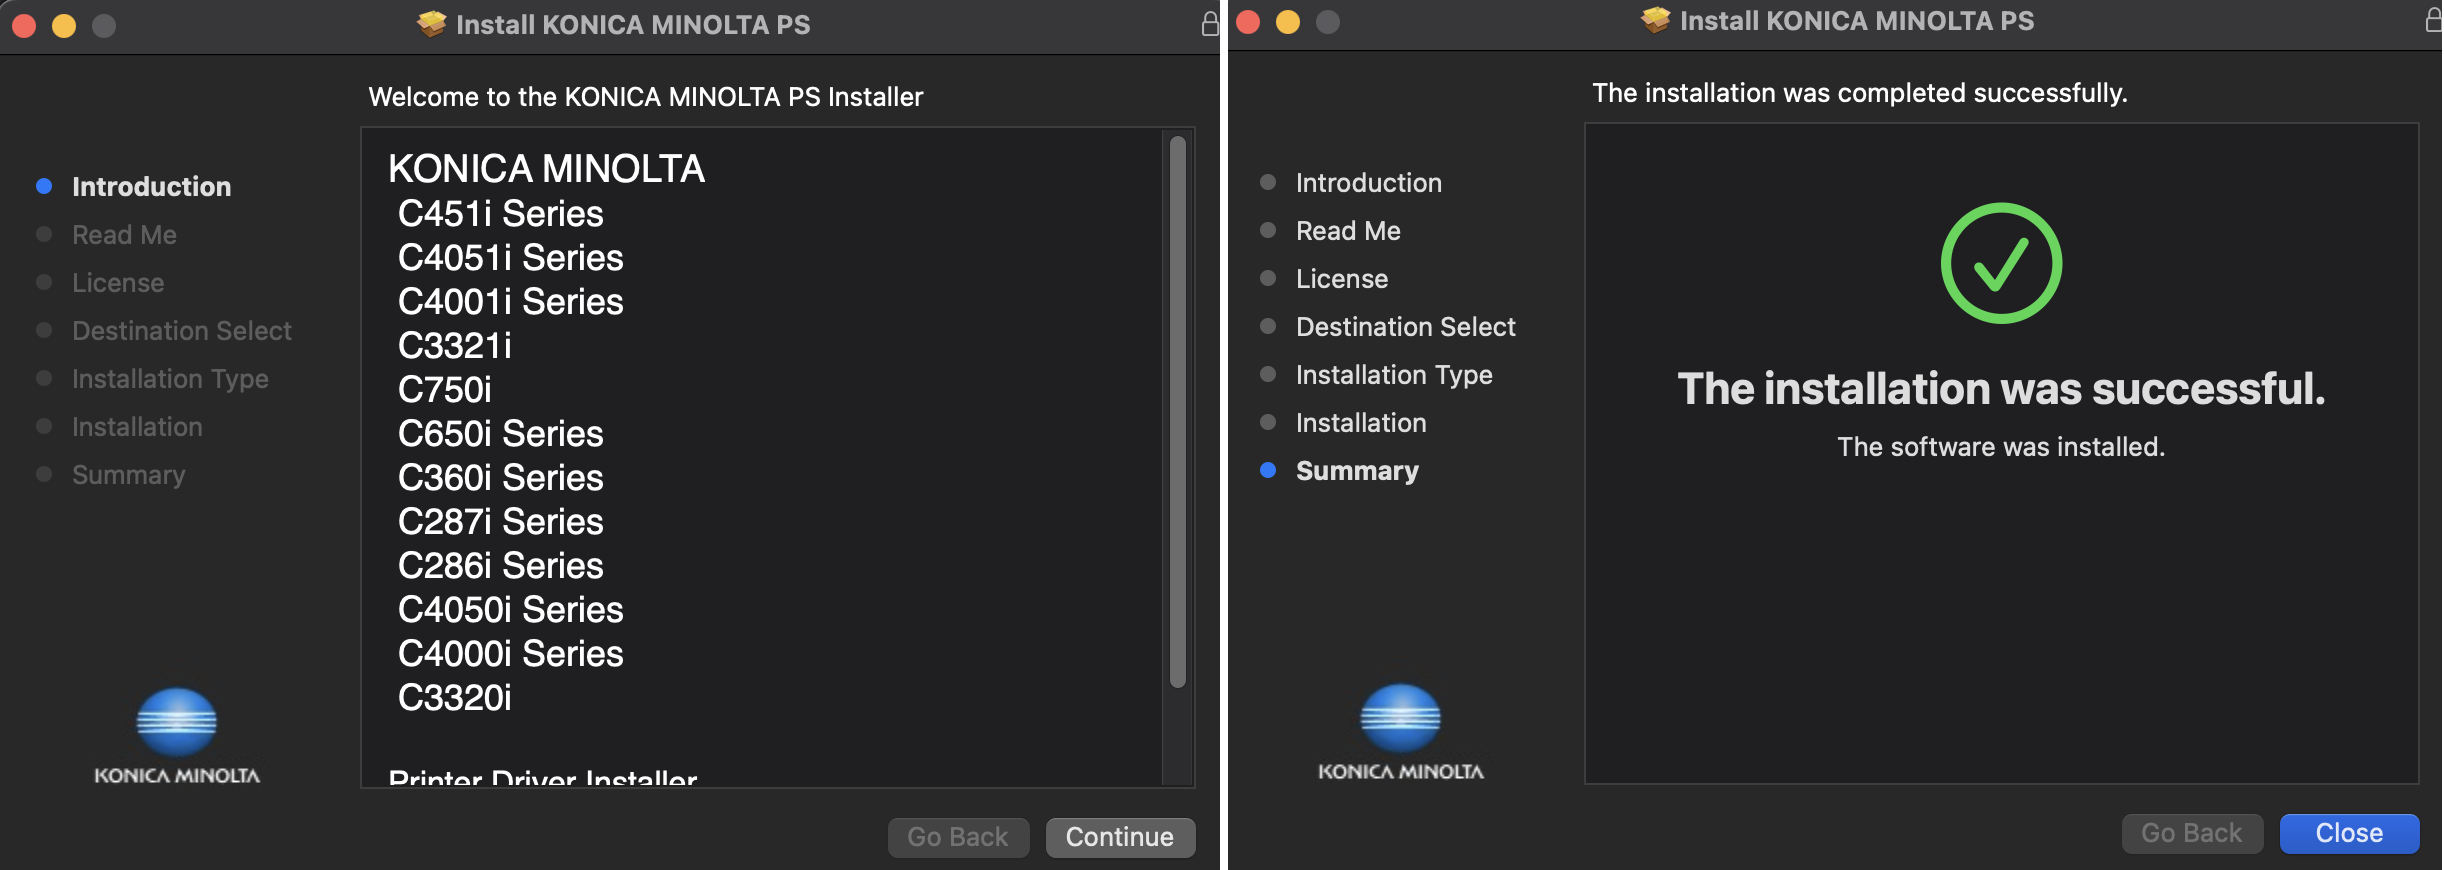
You may now close the installer and eject the IT6 drive.
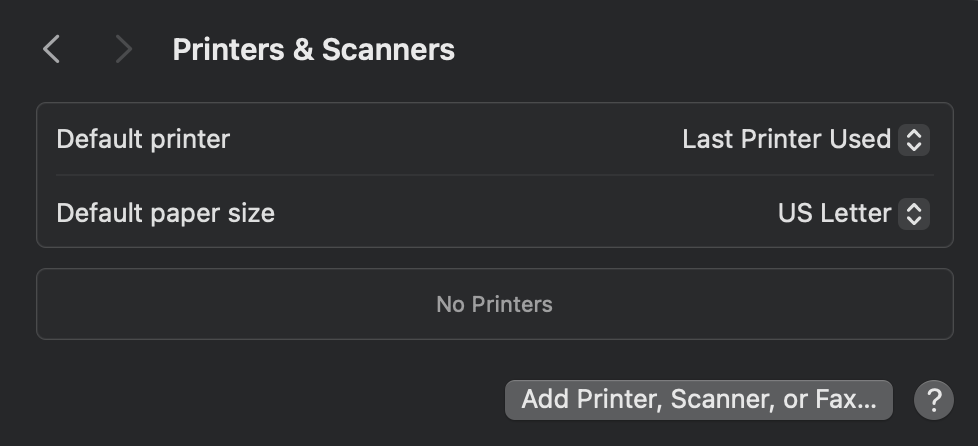
Adding the Printer
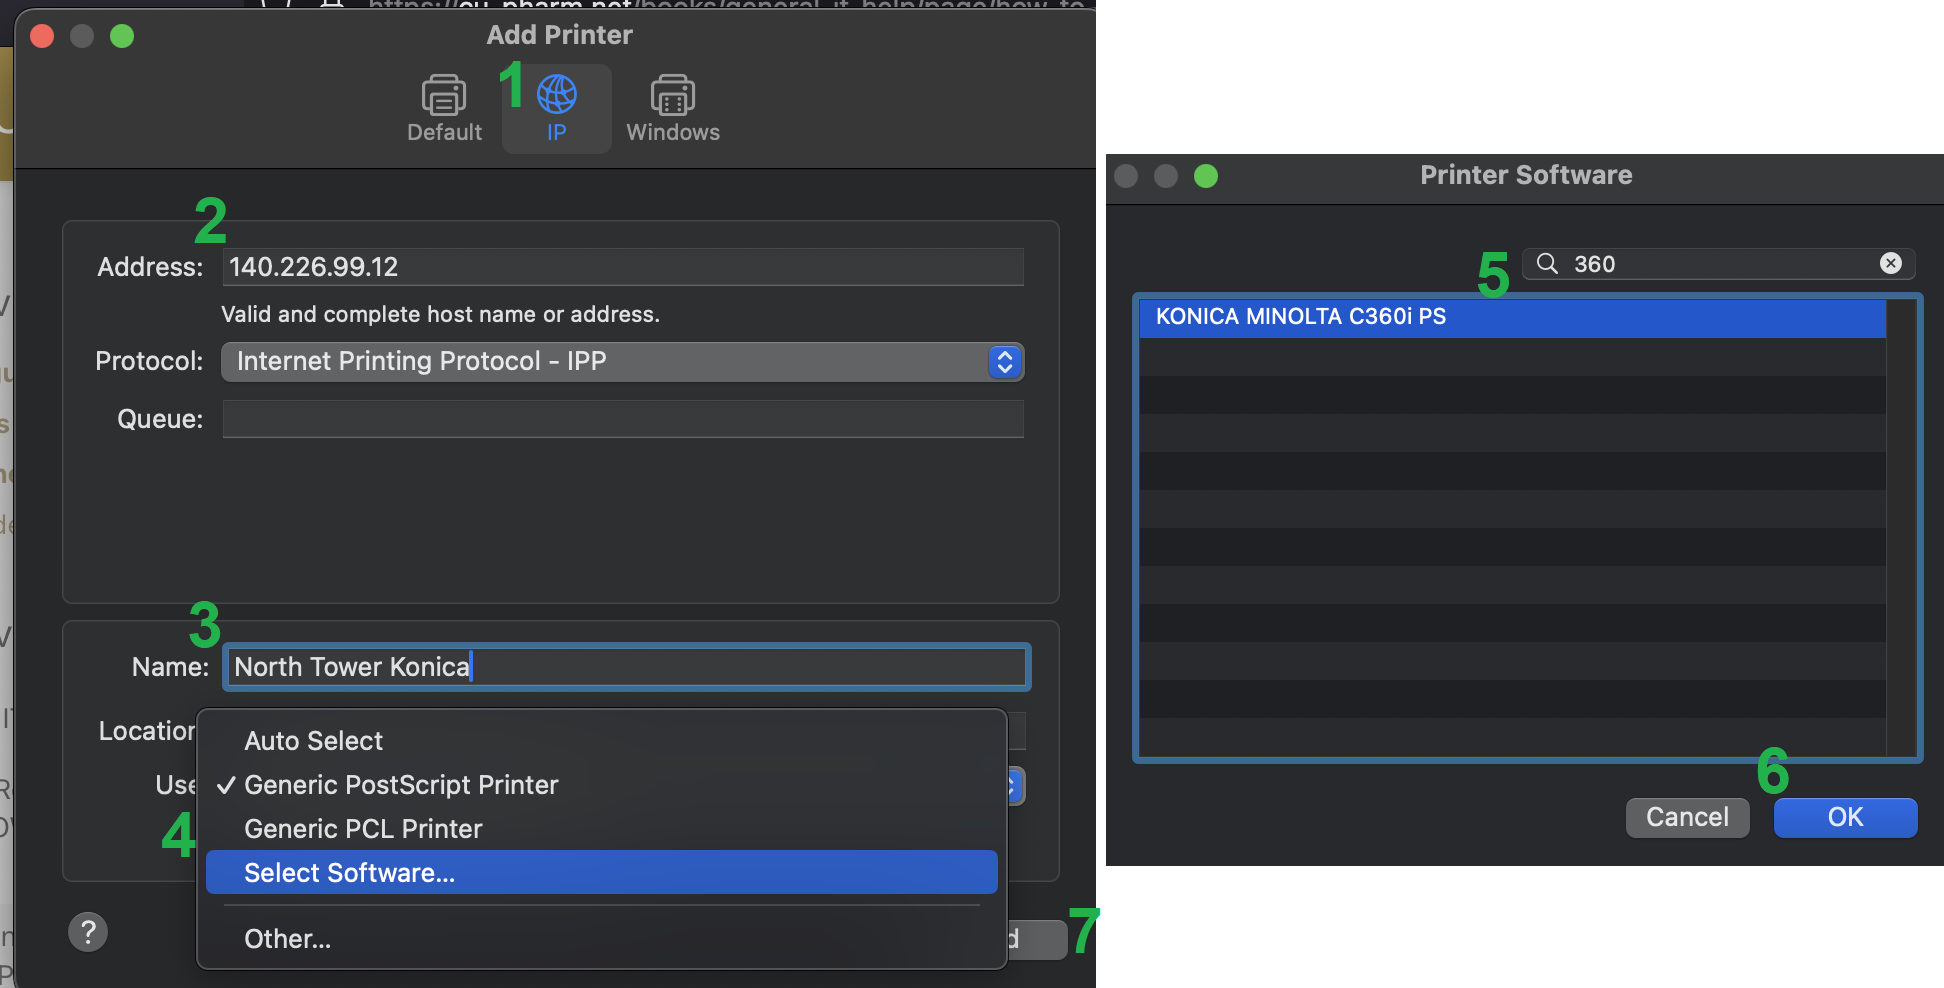
2. On this next window you will:
- Click the Globe IP icon in the center at the top
- Type in the IP address of the printer you want to install (140.226.99.12 for North tower or 10.35.106.164 for South Tower)
- Name the Printer (optional)
- Click the “Use” dropdown menu and select "Select Software"
- Find and select “KONICA MINOLTA C360i PS” from the list of options that appear.
- Click OK
- Click Add

3. On the next window that pops up, turn off "Allow Public User" and click OK: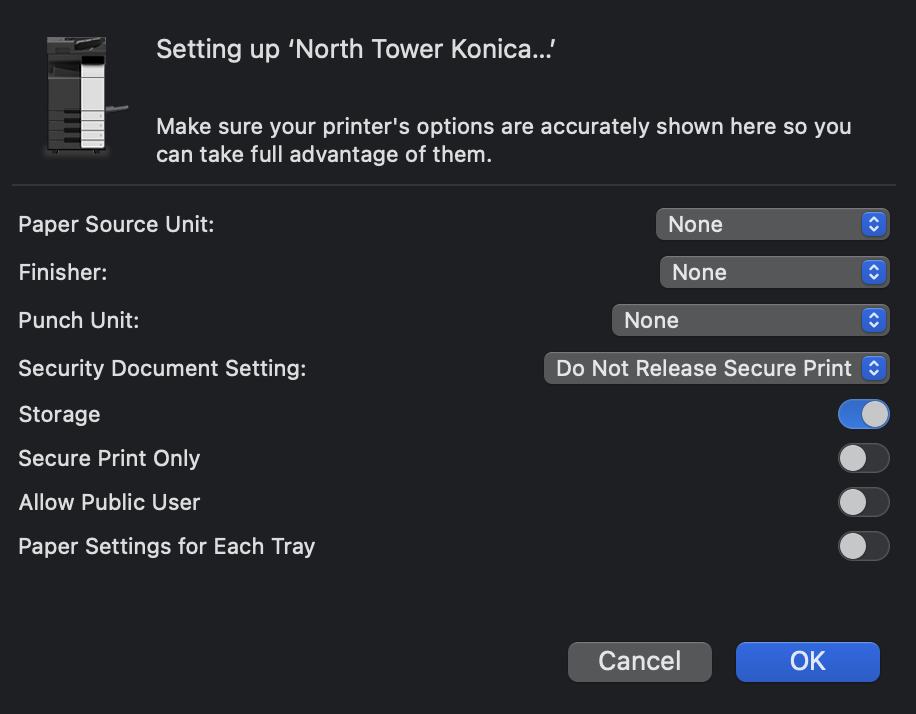
Configuring the Printer with your Lab Code
1. Now open Microsoft Word and press CMD+P as if to print a blank page. Scroll down and expand "Printer Options" and select the 'i' next to "Output Method."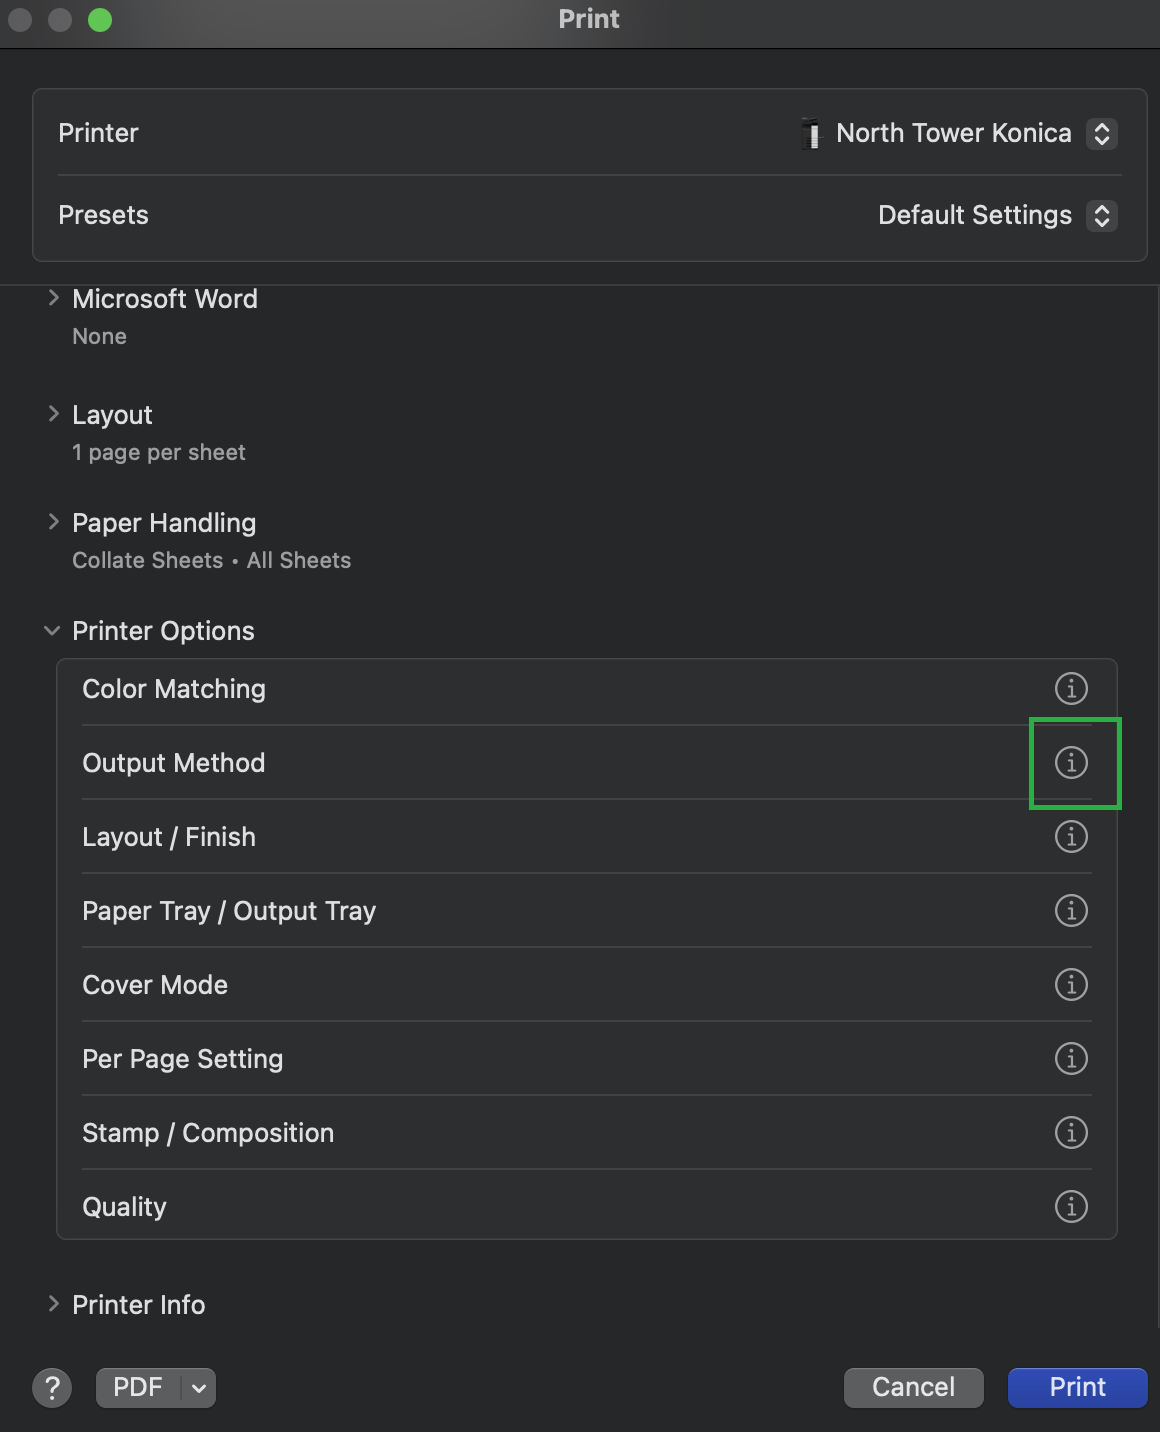
If you do NOT see "Printer Options" or "Output Method" here, you will need to use a different program. It is simplest to go to google.com in a browser and press CMD+P. Then select "Print using the system dialog..." You should then see the same settings as the screenshot above for "Output Method." If you still don't see "Output Method," you will need to reset the printing system and reinstall the drivers.
2. On the next pop-up screen, check the box for “Account Track.” Then put in your lab's copier code for the password and check the box for “Save Settings” before pressing OK twice.
If the "Save Settings" checkbox is greyed out, you will need to reset the printing system and reinstall the drivers.
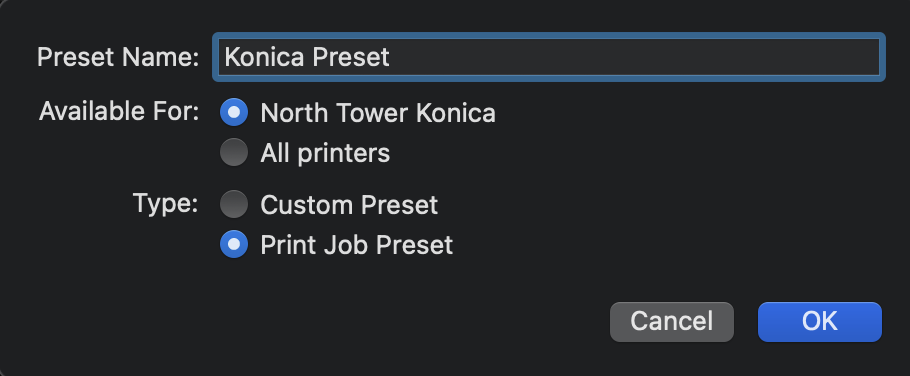
3. Back on the main printing window (Microsoft word or system dialog), change "Default Settings" to “Save Current Settings as Preset…” Name it something easy to remember and use that preset each time you print: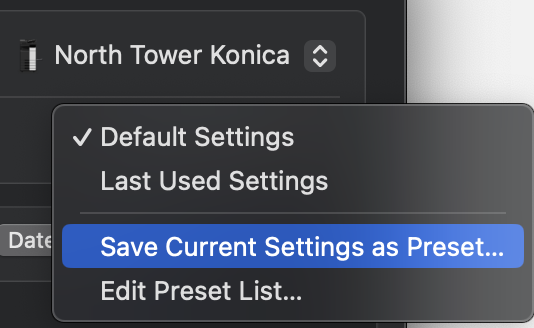
4. You can now close the print window, and the printer should now be ready to use!
Ensure you select the preset you created whenever you print to the Konica Minolta Printer since it has your lab code password saved.
How to Find and Use the Pharmacology Internal Webpage
Accessing the Internal Webpage
Overview of the Page


How to Scan to Email with the Konica Minolta Printers
Setting up Scanning

Scanning after Setup
- Place the document in the top feeder
- Enter your copy code
- Press physical "Fax/Scan" button
- Select your name from the address book
- Press the physical "Start" button
How to Use the Pharmacology Equipment Reservation System
- Spinning Disk Confocal
- Department Incucytes
- OWL Conference cam
- Department Laptop
- Epi/Slide Scanner
- Zoom Room L18-6121
- 2-Photon Scope
- Click on "Log In" in the top right:
- Enter your username and password (not necessarily the same as your University password)
- Find the equipment or room you want to reserve by using the dropdown menus (left menu is category, right menu is the actual equipment)
- You should get a month view showing all the current reservations for that equipment, you can change this view in the upper right:
- Click on a day (in month view) or time (in day view) to start creating a reservation. Enter a title and description for your reservation and doublecheck that you have the correct times selected:
- Once filled out, click "Save" to book the equipment. If you receive an error message, it is usually because you tried to reserve the equipment when it had already been reserved by another person. You can often contact the other person directly to see if you can work out a schedule that works for both of you, or alter your reservation to an open slot.
- If you are reserving the OWL or Laptop, see this article on retrieving them.
How to Report Spam and Phishing Emails
https://www.cuanschutz.edu/offices/office-of-information-technology/it-security/phishing
How to Use SharePoint as a Shared Drive
Instructions for the IT Admin, PI, and/or Lab Manager (expand box below):
Setting up a Lab Share
Click "+ Create Site" in the top left corner: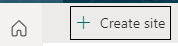
Choose "Team Site" and then "Standard team"
Click "Use template"
Fill in the details for your site, be sure to take a note of the site address: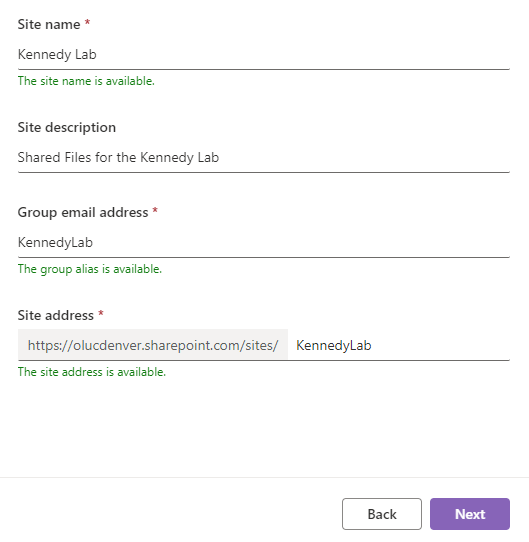
Leave the next page of settings on "Private" and click "Create site"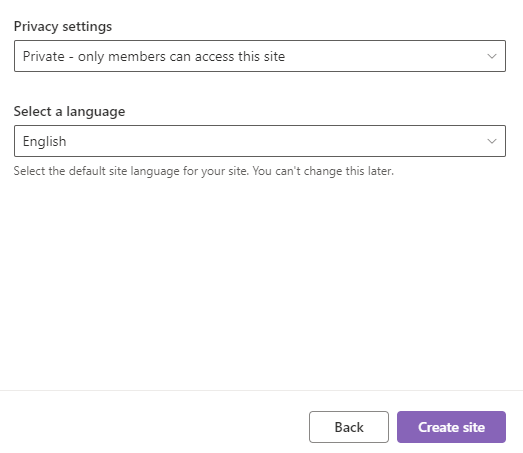
You can add members now, or follow the rest of the setup steps first (in this guide we'll skip adding members for now). You will see the site page with several pop-ups and options for customization. You can alter these if you like, but for our purposes (file sharing), we will leave everything as is for now.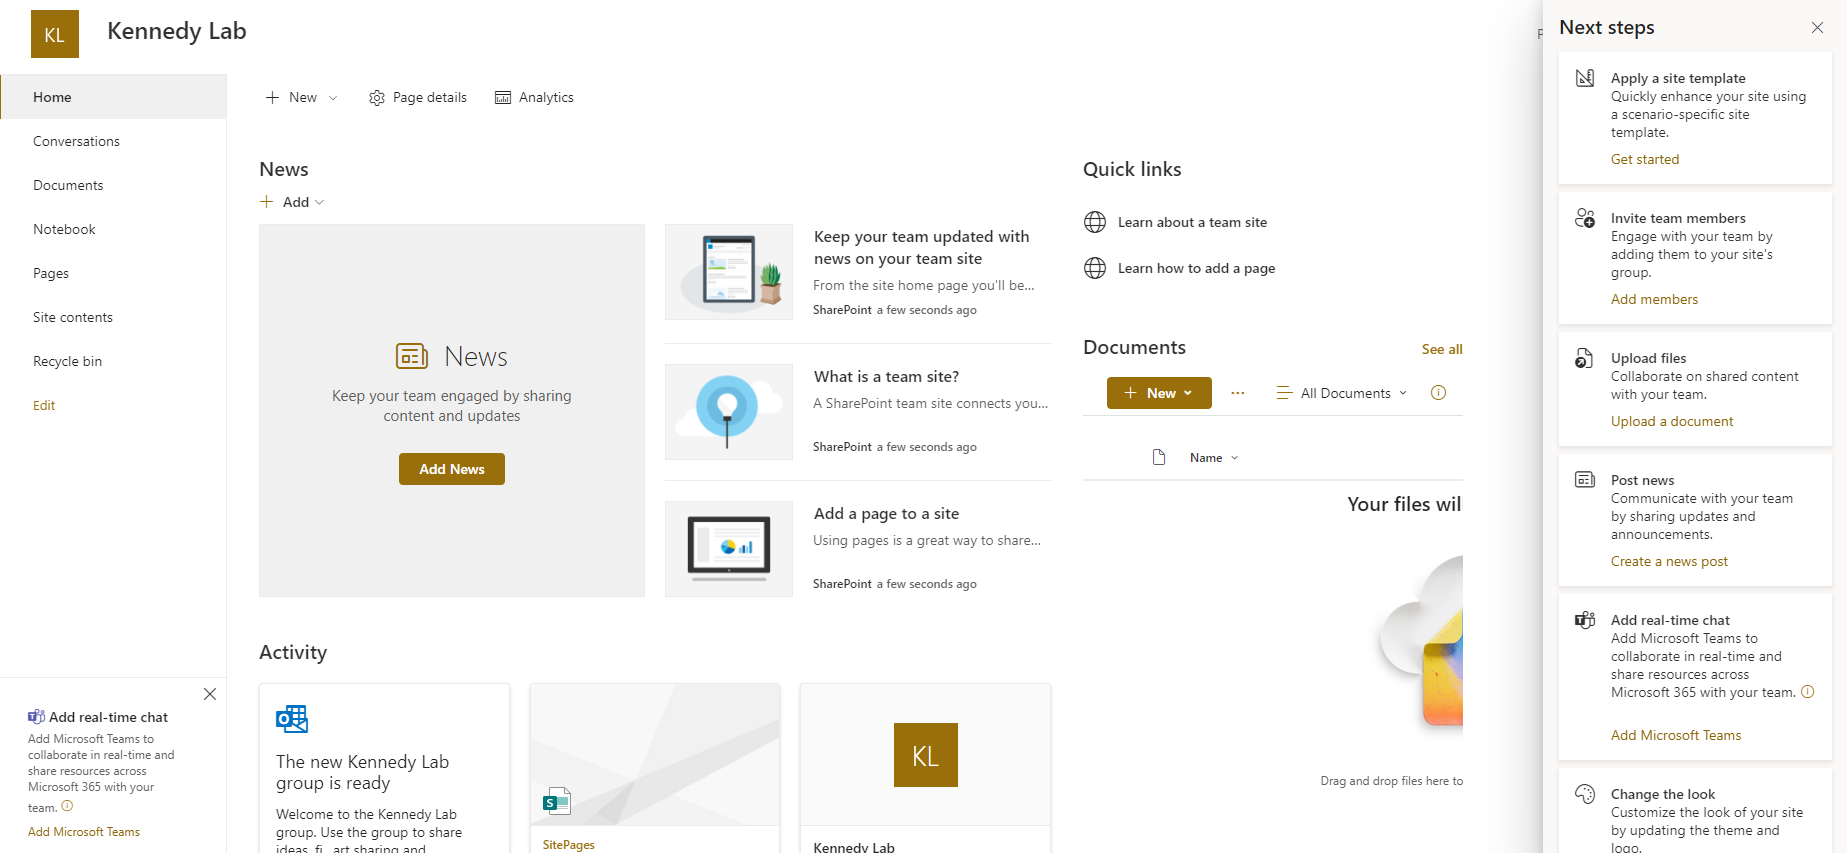
Once you have everything the way you'd like, you can add members by click the number of members in the top right (which should be 1):
Then click "Add members"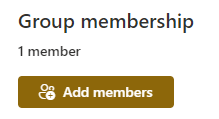
Start typing the person's email that you are inviting, and click the correct result. (Note that you can only invite people to your share if they have a @cuanschutz or @ucdenver email address).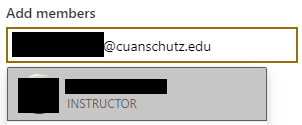
Keep adding names until all the appropriate lab members have been added.
It is a good idea to have a second owner of the site as well. Generally, the owners will be the IT Admin, lab manager, and/or PI. Use the dropdown under the person's name to select "owner" for these individuals.
After you click "save," the individuals will receive a welcome email. If they use outlook on the web, they can access the same features of the SharePoint site by clicking the name of the group at https://outlook.office.com/groups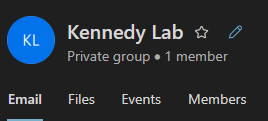
For Lab Members
For more streamlined use, we recommend following this guide to use Rclone instead of OneDrive. OneDrive instructions are provided below if you would rather use it.
If you have a lot of files in your OneDrive, the initial sync may take a long time. Please wait for it to finish before following the rest of these steps!
Request from your Lab Manager to be added as a member to your Lab SharePoint page if you haven't already received the welcome email:
If you do not know the address of your lab's SharePoint page, ask your Lab Manager or IT Admin. You can also navigate to it by following the link in the welcome email that looks like this:
You can bookmark the site for future reference.
After you have OneDrive installed, go to the SharePoint page (see above) and click on "Documents" on the left side. Then click the "Sync" button on the ribbon: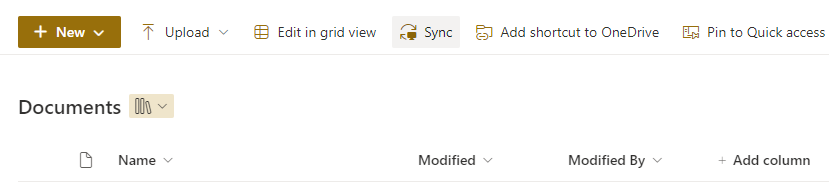
You will get a popup asking for permission to use OneDrive (make sure you've installed OneDrive), check the box and click "Open"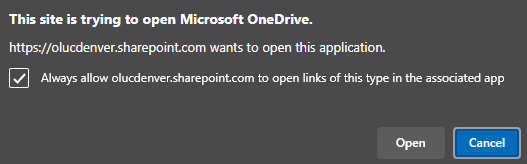
After some loading, you should then see a pop-up confirming that files are now being synced: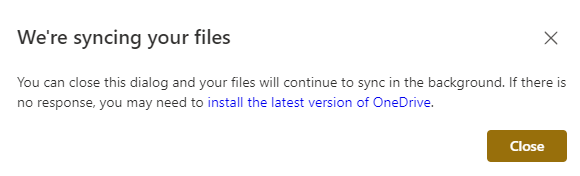
Now open file explorer and there should be a new drive called "The University of Colorado Denver" that has the name of your lab share inside:
If you copy a file into this folder (or save a file into this folder) it will sync with the share. Syncing will be a bit slower than using Isilon drives, but after a few moments you should see the status change from the sync icon to a green checkmark: becomes
The process is the same on a Mac computer, but looks slightly different:
If you look back at the SharePoint site, you will see the file(s) in the list. If you want to drag and drop files directly into the documents folder on the SharePoint site (instead of using File Explorer), that is an option as well.
The advantage to using OneDrive is that you can remove the file from your computer entirely while still keeping it in SharePoint, freeing up computer space. Any files that have a green check mark icon are saved locally. You can right-click them and choose "Free up space" and it will be deleted from your computer (but kept in SharePoint):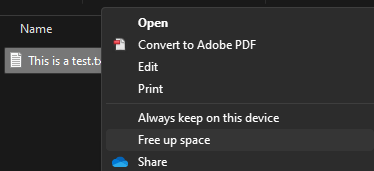
Now the icon will be a cloud. If you need to access the file, double-click on it and it will be downloaded on demand (changing back to a green checkmark). Any time you save any changes, it will briefly sync before returning to a green checkmark.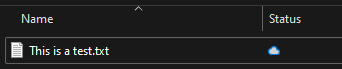
In file explorer and on the SharePoint site, all lab members can be simultaneously working with files. Keep in mind that when you see the sync icon on a file, it is likely open by another lab member or in the process of saving.
Keep in mind that each computer that you want to sync to the SharePoint files will need to go through these steps. Think of it as mounting the drive on that computer.