IT App Support
Adobe, Global Protect, Office, and other University Licensed Software Guides.
- How to Re-install Global Protect (VPN) for PC & Mac
- Adobe Licenses Explained
- How to Install Microsoft Office 365 (Now called Apps 365)
- How to Install Adobe Acrobat (& Other Adobe Apps)
- Docusign 101
- How to Open/View PST Files
- Admin Team: How to Add/Update Guides on CU-Pharm.net
- Set up RClone to Mount a SharePoint Drive (Windows)
How to Re-install Global Protect (VPN) for PC & Mac
Many Issues in Global Protect can be resolved by uninstalling and reinstalling it. Try the steps below, and if the issue persists, contact IT.
Uninstall Global Protect (PC)
*Click here for Mac Instructions
- Open Windows settings (WIN+i), click "Apps" on the lefthand side, and then "Installed apps" at the top of the right-hand list.

- Scroll down to Global Protect and click the 3-dots to the right of it, then click "Uninstall" (confirm the popup by clicking Uninstall again)

- It is now uninstalled. It is a good idea to restart your computer at this time to finalize the change.


Install Global Protect (PC)
- Make sure you have the most up-to-date version of Global Protect from OIT's VPN webpage.
- Run the installer file from your downloads folder

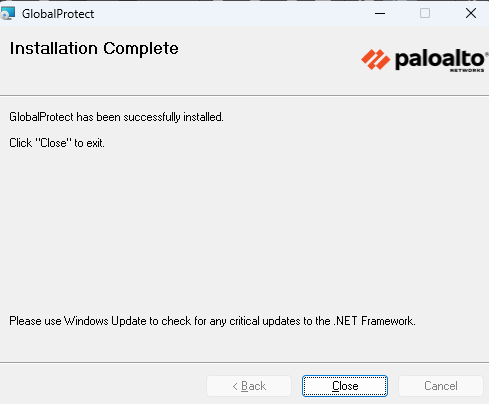
- Follow the installer prompts, clicking "Next" and wait for the install to finish, then click "Close"

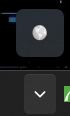
- You will now have an icon in your taskbar tray (which may be hidden behind the ^ symbol)

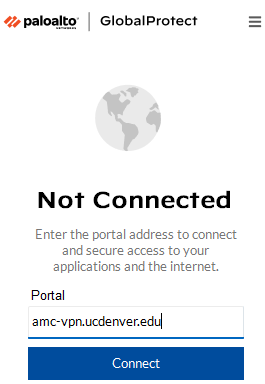
- Click on the icon, and then "Get Started." Enter amc-vpn.ucdenver.edu into the box and click connect:

- A window will pop-up to log in with your University credentials. After doing so, you should be connected and using the VPN.

Note: The VPN does not work when connected to the network on campus. The VPN is used when working remotely to connect to the campus network.
Uninstall Global Protect (Mac)
Adobe Licenses Explained
Note: Students can Access Creative Cloud using this same process. To only use Acrobat as a student, see this link.
A. You need to use multiple Adobe products (Illustrator, Photoshop, etc.)
B. You only need the ability to edit and manipulate PDFs (Acrobat)
C. You only need to view PDFs on occasion.
Licenses are assigned to individuals. Each individual is allowed to be signed into their Adobe account on two computers simultaneously. If you need Adobe products running on multiple computers (i.e., for a lab), you can request licenses for multiple lab members. (Lab member A signs into computers 1 and 2 - Lab member B signs into computers 3 and 4, etc.)
Note that students follow the same process for the full Creative Cloud license.
OIT has an excellent list of Frequently Asked Questions at this link: https://www.cuanschutz.edu/offices/office-of-information-technology/tools-services/adobe-creative-cloud---faculty-staff
How to Install Microsoft Office 365 (Now called Apps 365)
This article will walk you through installing the Office 365 (also referred to as "O365") suite using your University email account.
If you already have a version Office installed on your computer, you will need to uninstall it before completing the following steps.
- Log into your email at myemail.ucdenver.edu
- Click the grid icon in the top left corner of the screen then click Office 365

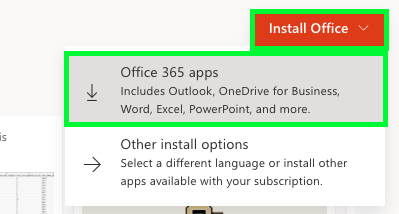
- Click Install Office on the top right corner of the screen then click Office 365 apps
- Run the installer the download to install the O365 applications on your computer.
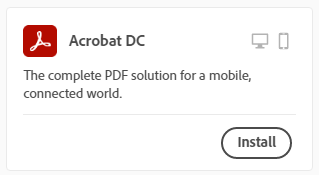
How to Install Adobe Acrobat (& Other Adobe Apps)
Before you begin, make sure you have an active license for either the Creative Cloud suite or Adobe Acrobat. The University no longer licenses Adobe products to specific computers, it is now licensed to users. IT can check to see your license status and place an order for you if you provide a Speedtype. You should eventually receive an email titled "Get started with All Apps EDU" which indicates that you can now take the following steps:
Note that this process looks slightly different on a Mac, but functions the same.
1. Go to Adobe.com and click the "Sign In" link in the top-right corner.
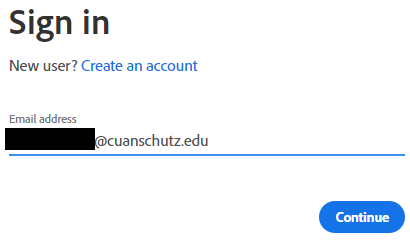
2. Sign in using your anschutz.edu email address:
3. Click on the grid icon in the top-right and select "Creative Cloud" (Skip this step if you logged directly into creativecloud.adobe.com)

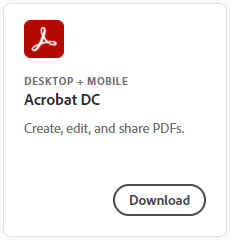
4b. If you will need more than just Acrobat, use the download link for Creative Cloud:
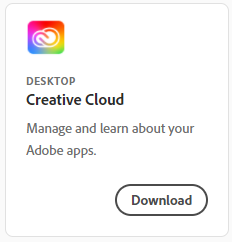
In either case, you will end up installing the Creative Cloud app first, which will then install the other Adobe programs for you. It will automatically install Acrobat if you use the Acrobat link.
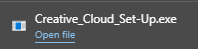
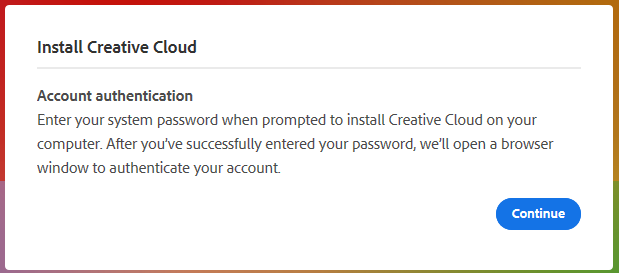
5. Open the file that you downloaded
6. Click "Continue" and then the OK that pops up.
7. Assuming you are still signed in, you should see this:
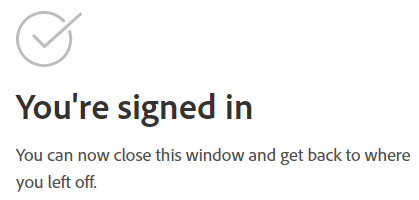
If not, you will need to sign in again.
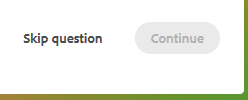
8. While it is installing, you can skip the questions.
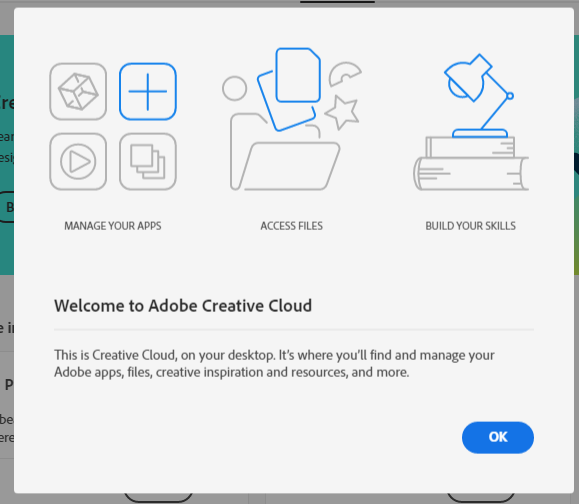
9. Once the installer finishes, you will get a welcome pop-up, click ok
10. Now you can find the programs that you want to install and click the Install button for each one.
Note: If you had an older version of Acrobat installed, make sure you uninstall it before installing the new one.
11. You may get a pop up if you are using any Microsoft Office programs, so you will need to save your work and close them before continuing.
12. Wait for the installation to complete, you will see a percentage in the top-right part of the program:

You can queue up other programs you want to install while it is working.
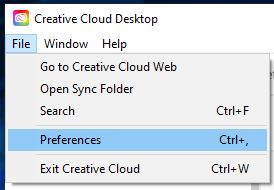
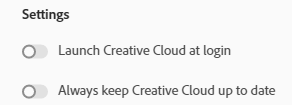
13. While installing or after installing, we recommend the following steps to save computer processing power. Go to File > Preferences and turn off both of the toggles there. This will prevent the Creative Cloud program from running in the background since it is not needed after installation.
14. Once the install is complete you should see it listed similar to this:

You should also find a desktop shortcut.
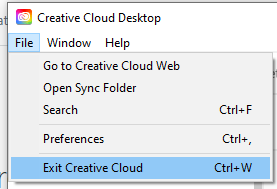
15. Exit the Creative Cloud program by going to File > Exit Creative Cloud. Pressing the X in the top right will not close the program, only hide it.
16. When you open the newly installed program, in a few minutes it should sign you in automatically. You can see a message with your name or click the blue pie chart icon to see if you're logged in.

17. Acrobat will ask if you want to make it the default PDF application, click Yes. Then click Continue, Change, Ok, then Ok.
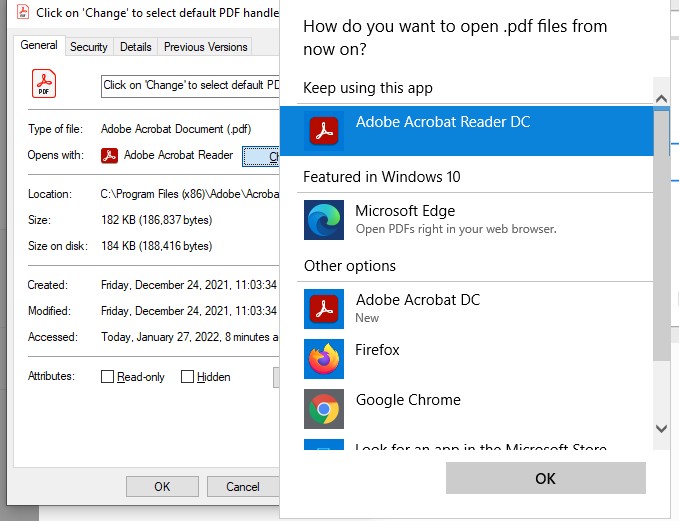
In some cases, the pop up won't go away automatically, press esc or the X to close it.
And that is all the steps! If you run into an issue that isn't covered in this guide, please contact IT.
Docusign 101
DocuSign is a HIPPA-compliant resource that allows users to view, create, send, manage, and sign documents electronically.
Use the links below to learn more about DocuSign. Want sending and template access? Fill out this form to request access.
DocuSign vs Adobe | Getting Started | Tutorials | Frequently Asked Questions
DocuSign versus Adobe Digital IDs
DocuSign and Adobe Acrobat both are/have electronic signature solutions, but they are separate programs. DocuSign is a HIPPA-compliant, web-based platform aimed specifically at creating and sending envelopes for electronic signatures. Adobe Acrobat is a standalone program that includes functionality to electronically sign documents, called Adobe Digital IDs. Acrobat is not provided to all School of Medicine users, but if you're interested in a license, please reach out to support@medschool.zendesk.com.
For more information about Adobe Digital IDs, including how to create one, please visit this link.
Getting Started
Enter your @cuanschutz.edu email address into the box and click Continue.
You will be redirected to a CU Passport login page. Log in with your credentials.
That's it!
To learn more about how to utilize DocuSign, click the Tutorial links below or check out the DocuSign instructional videos here.
Tutorials
Signing a document/envelope

More on signing a document: https://support.docusign.com/en/articles/How-do-I-sign-a-DocuSign-document-Basic-Signing
Sending an envelope

More on sending an envelope: https://support.docusign.com/en/articles/How-do-I-get-signatures-on-a-document-New-DocuSign-Experience
Fields and Labels

Placing Fields

More on adding fields to envelopes: https://support.docusign.com/en/guides/ndse-user-guide-add-fields
Creating Templates

More on creating templates: https://support.docusign.com/en/guides/ndse-user-guide-create-templates
Send Envelope Using a Template

More on adding supplemental documents to an existing template: https://support.docusign.com/en/guides/ndse-user-guide-add-files
Editing a Template

More on editing a template: https://support.docusign.com/en/guides/ndse-user-guide-edit-templates
Frequently Asked Questions
Q: Is DocuSign HIPPA-compliant?
A: Yes, DocuSign is HIPPA-compliant.
Q: Are there other resources I can use for HIPPA-compliant electronic signature forms?
A: RedCap
Q: Is our DocuSign 21 CFR Part 11 compliant?
A: No, the School of Medicine's instance of DocuSign is not Part 11 complaint.
Q: Do we have to pay for CU users to have access to DocuSign?
A: No, DocuSign accounts are provided for users in the School of Medicine.
Q: What is an envelope?
A: An envelope is a term that refers to a document package that needs a signature or signatures.
Q: We have multiple people authorized to sign certain documents for our group/department. Can all users receive alerts when a document needs to be signed?
A: Yes, this is possible. Please put in a ticket at support@medschool.zendesk.com for information about this.
Q: I logged into DocuSign using my credentials but I cannot send envelopes. What's going on?
A: The default user type is Viewer. If you did not request a DocuSign account with upgraded permissions, you will only be able to view and sign envelopes. If you need upgraded permissions to allow you to send envelopes or create templates, please fill out this form.
How to Open/View PST Files
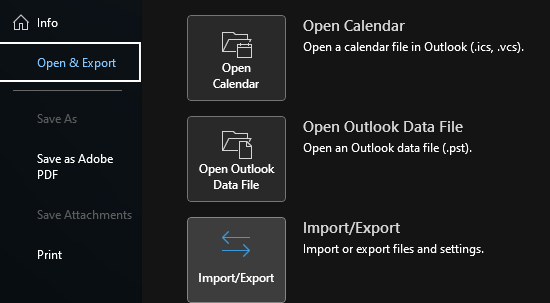
Open the Desktop application for Microsoft Outlook and click File > Open & Export > Import/Export:
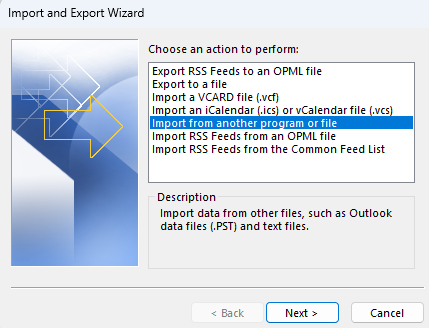
Keep the default selection of "Import from another program or file" and click Next >
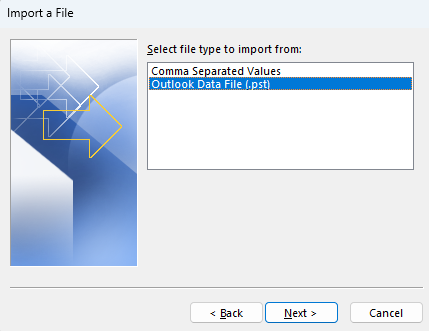
Select Outlook Data Fille (.pst) and click Next >
Browse for the location of the PST file you are opening, leave the other options at default, and click Next >
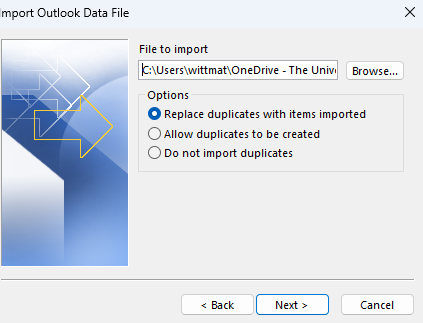
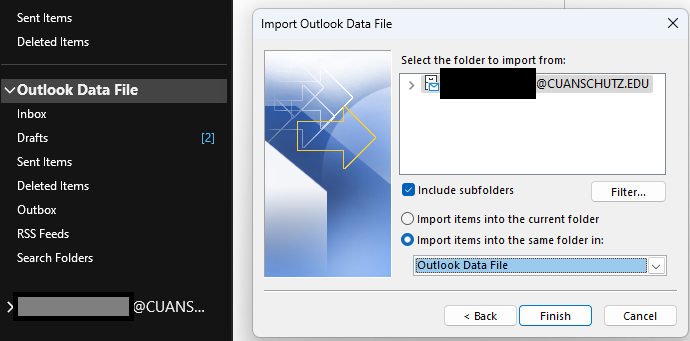
On this pop-up, you will see the mailbox that you are importing appear on the left hand-side, underneath any of your current folders/mailboxes. Keep default values and press Next >
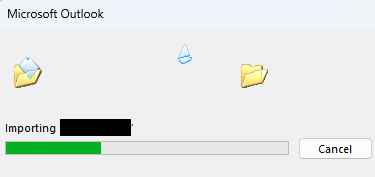
Importing will then take a few minutes:
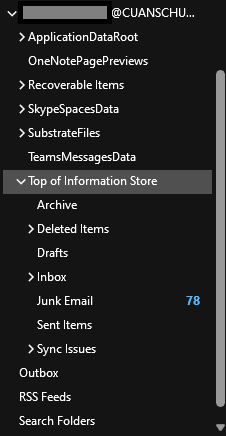
To go to the inbox and other emails of the pst file, expand "Top of Information Store"
If you have a second PST file to import, repeat the above steps as before.
The PST files may have been split into multiple parts to reduce file size and file corruption.
Admin Team: How to Add/Update Guides on CU-Pharm.net
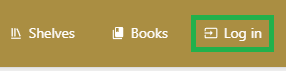
When you first go to cu-pharm.net, click on the login button in the upper-right:
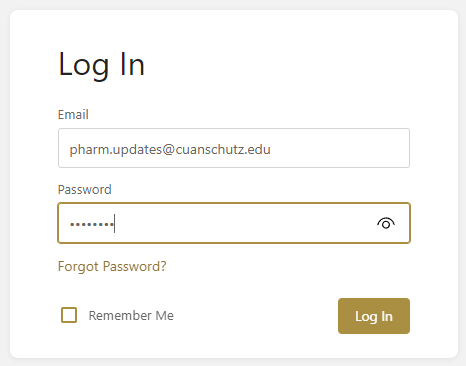
Enter your email address and the password that Matthew sent you:
Once you log in, you will now see a third "shelf" for Admin Policies & Procedures:
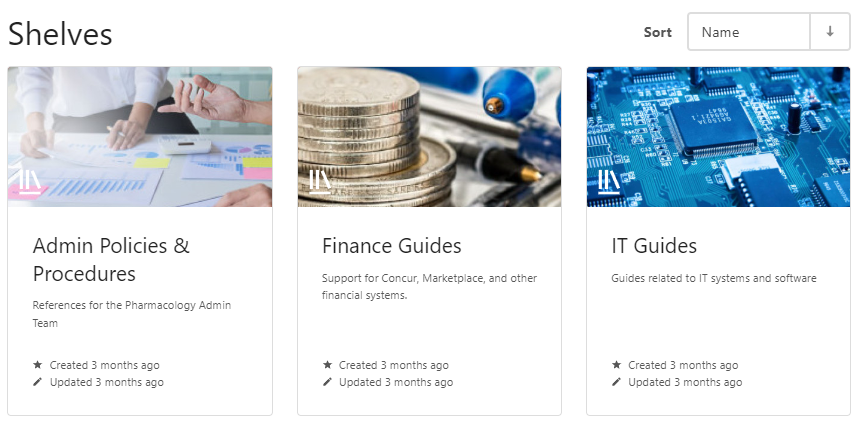
CU-Pharm.net is organized like a library, with shelves that hold different books, which have different pages (or guides). For example, if you are having issues installing a printer, you would go to the "IT Guides" Shelf, select the "General IT Help" Book, and go to the page on installing the printer.
The site also has chapters if you have a particularly complex guide that needs to be broken down into multiple pages.
Click on Admin Policies & Procedures to see the three books on that shelf. Only logged in users can see anything on this shelf:
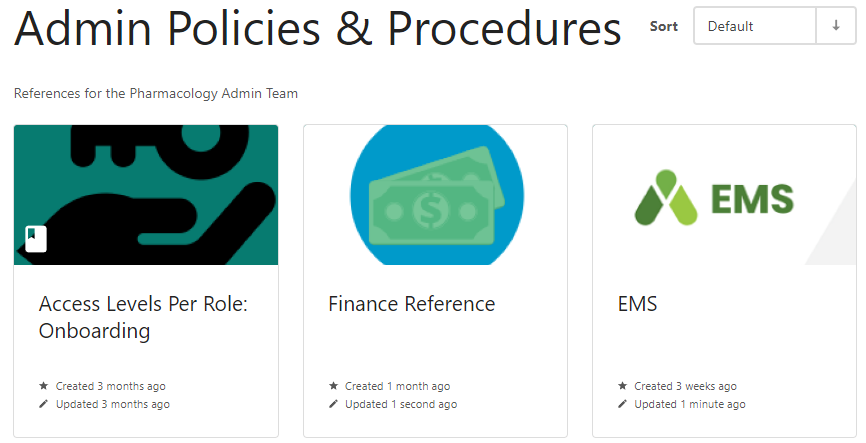
You can now click on any of these to see the different guides (pages) inside of them. For example, the first one has the most information at this time:
Once you open one of these pages while logged in, you should see options on the side panels for editing:
Clicking on "Edit" will allow you to type into the page and make updates including inserting pictures and link much like you do in Microsoft Word:
When you are finished, click "Save Page" in the upper-right. The updated page will be available immediately on browser refresh or the next time an Admin Team member visits the page.
If you would like to see the history of updates, click "Revisions" in the sidebar. This can help spot pages that haven't been updated in a long time. It can also help by restoring/referencing an old version of a guide if needed.
Editor Features
It is best to organize your guide with headings. Doing so will show the heading on the left sidebar, allowing someone to quickly navigate to a section by clicking on it:

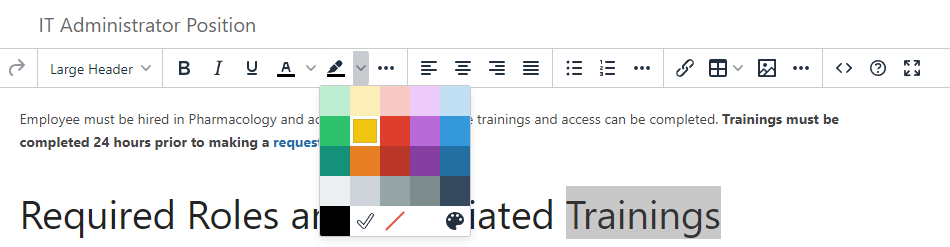
To create a colored callout box like this one, first type out the text as usual (Paragraph). Then select it and change the dropdown menu from "Paragraph" to the color you would like to use.
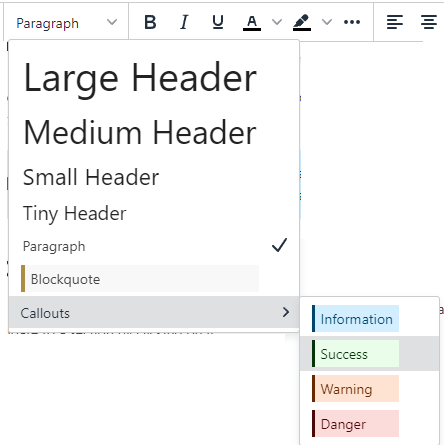
Other features to be aware of are linking, inserting tables, pictures, horizontal dividing lines, code blocks (easy copy button), and more. Most of these advanced features are located on the right side of the toolbar, sometimes underneath a 3-dot submenu.
Set up RClone to Mount a SharePoint Drive (Windows)
Scripted Setup
I have made a script (right-click and "save link as" to download) to help get rclone set up quickly. If the script doesn't work for you, the steps that the script does at listed at the bottom of this guide.
First, download and install this program: https://winfsp.dev/rel/
-Download the Installer and follow the wizard with default settings to install.
Script Steps
- Download the script from this link (right-click and "save link as" to download) and save it to your downloads folder
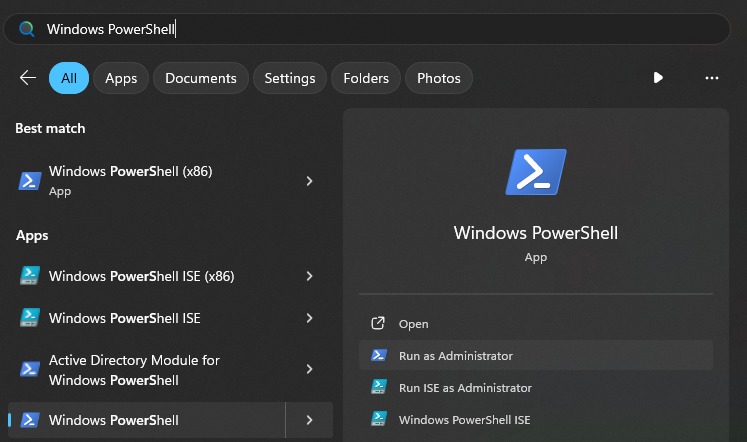
- Open PowerShell as an administrator:

- Paste the following commands and press enter (one line at a time):
Set-ExecutionPolicy Unrestricted (press Y, then enter) cd ~\Downloads .\setup-rclone.ps1 - You will be asked to name the mounted drive, type in a name (make it the same as step 2 below) i.e. kennedylab
- Follow the guided prompts below:
Guided Prompts
Most of the following commands are from rclone's OneDrive guide, which you can reference here.
You should see an interactive options selection like this: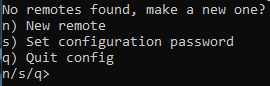
- Type n and press enter for a new remote
- Type a name for it, I'm using "kennedylab" for this example
- Type the number showing next to OneDrive (in my case, it was 35)
- Leave the client_id blank and press enter
- Leave the client_secret blank as well
- Type 1 for region (Microsoft Cloud Global)
- Type n to skip advanced configuration
- Type y to set up authentication
Your browser will automatically show a sign-in screen. Sign in with your University credentials and then you should see this confirmation in your browser: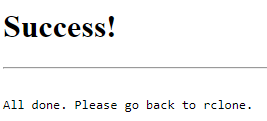
Back at the PowerShell window:
- Type 3 for SharePoint or 1 if you're using your own OneDrive storage (this example is using SharePoint)
- Type the URL of your SharePoint site (in this example I am using https://olucdenver.sharepoint.com/sites/KennedyLab)
- If you do not know the address of your lab's SharePoint page, ask your Lab Manager or IT Admin. You can also navigate to it by following the link in the welcome email that looks like this:

- If you do not know the address of your lab's SharePoint page, ask your Lab Manager or IT Admin. You can also navigate to it by following the link in the welcome email that looks like this:
- Type 1 to use the documents library
- Type y to confirm
- Type y one more time to confirm
You should now see a main menu again: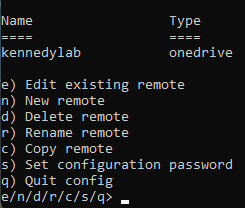
Type q to quit the configuration wizard.
You should now see a shortcut to mount the drive to L:\ on your Desktop. Double-click it and you should see the share in File Explorer
The drive should automatically mount when logging in as well.
Mounting the drive opens a minimized command prompt window. Closing the command prompt will unmount the drive.
Manual Steps if the Script Doesn't Work
You will still need to install winfsp from the link at the top of this guide.
Download rclone from this page (for windows select the Intel/AMD 64 bit one). Extract it and put the extracted folder in an easy to find location.
Open a command prompt (Search for cmd)
Change the directory your command prompt is in to inside your extracted folder. For example:
cd %USERPROFILE%\Downloads\rclone-v1.62.2-windows-amd64I recommend renaming the long folder name to "Rclone" and moving it directly to the C drive. Then you only have to type cd C:\Rclone
Run the command
rclone configThis brings up the same guided prompts as outlined above.
With a non-administrator command prompt open, you can now mount the SharePoint drive with the following command (replace "kennedylab" with the name you provided earlier):
rclone mount kennedylab: L: --network-mode --vfs-cache-mode fullVerify that you can now see and interact with the mounted drive.
Automatic mounting of the drive takes several extra steps, contact IT for help.