How to Upgrade to Windows 11 (by Oct 2025)
The world and the university are transitioning to Windows 11. Microsoft has designated October 14, 2025 as the last day of support for Windows 10. After this date, Windows 10 operating systems will no longer receive security updates, non-security updates, or online technical content updates. Using Windows 10 beyond its end-of-life date poses significant security risks to the system and data. As a result, the university will transition all university-owned workstations to Windows 11 well before October 14, 2025.
Note: Any Windows computers that run offline do not need to be upgraded. Older lab equipment that requires these old systems can still be used so long as the computer stays off the network. Do keep in mind that as these systems age, replacement parts and the ability to repair them becomes increasingly difficult or impossible in many cases.
This guide outlines how the Department of Pharmacology plans to make the transition. There are essentially three options:
- Preferred Option: Follow the instructions below to download and install Windows 11 on your own computers that are currently running Windows 10. This option allows you to upgrade at a time that is convenient for you and does not require IT intervention.
Schedule a time for Matthew to upgrade your computer.- Starting in July of 2025, computers in Pharmacology detected on the network with Windows 10 will be upgraded automatically overnight.
Note: Mac Users using Bootcamp, Parallels or similar configurations to run Windows will also need to upgrade to Windows 11 within that environment. See Microsoft's page for more information.
Upgrade by Downloading Windows 11
Upgrading to Windows 11 will take at least 45 minutes from start to finish. Be sure you allot enough time for the process.
1. The simplest way to upgrade is to follow this link to download Installation Assistant for Windows 11. Once downloaded, launch the file from your browser downloads list or from inside your downloads folder.

2. Click The "Accept & Install" Button
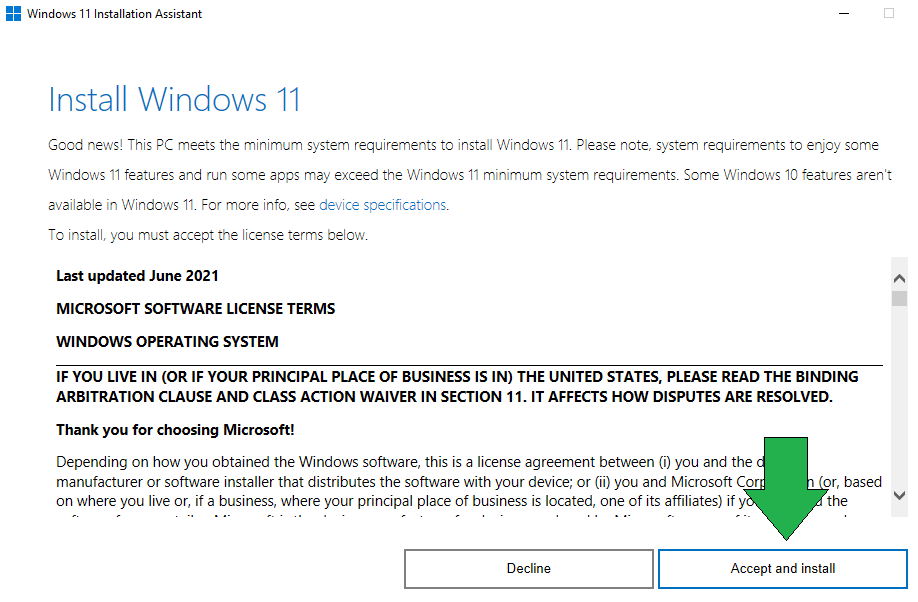
If you do not see the above screen, but instead see "This PC doesn't meet the minimum system requirements to install Windows 11," your computer may need to be configured with TPM turned on or its hardware does not meet the requirements. You will need to either upgrade the hardware or replace the computer.
3. It will take a few minutes to download. While you wait, doublecheck that you have backed up any essential data.
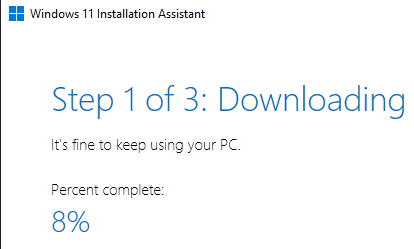
4. It will run a quick verification, and then begin installing (which takes around 30+ minutes):

Note: You can click the X in the top right to cancel the installation.
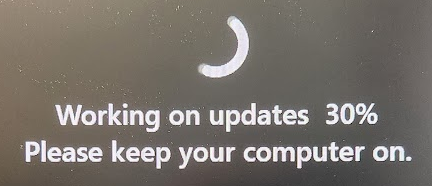
5. Once it is ready and you've closed any open programs, click Restart now, the computer will then take about 15 minutes to complete the installation:

6. After logging in, you will get this message:

7. Once you are fully logged in, most of your settings should still be in place. The start menu and icons will have moved to the center:

In some cases, the installer encounters an error and reverts to Windows 10. If this is the case, contact OIT for assistance using a secondary method.
Optional Settings Adjustments (Move Taskbar to the Left)
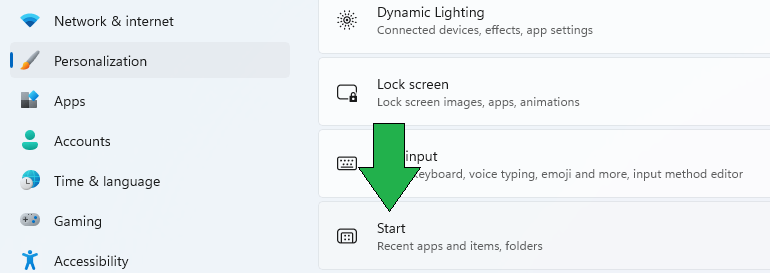
1. Open up Windows settings by pressing the WindowsKey+i (or open the start menu and click settings).
2. Select "Personalization" on the left side and go to "Start"
3. Turn off the setting for recommendations (you can adjust other settings here as desired):

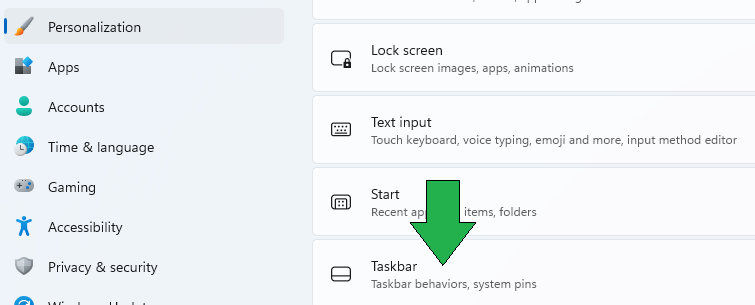
4. Next, go back to Personalization and go into Taskbar settings:
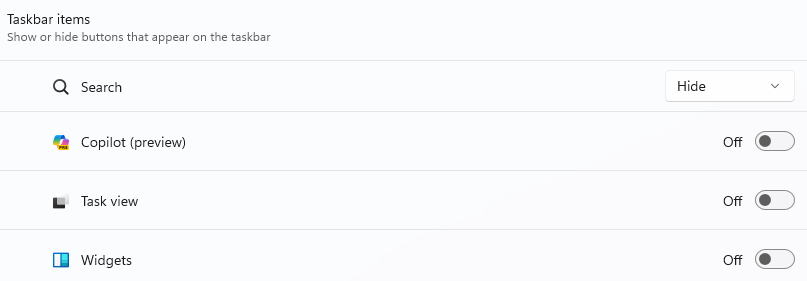
5. For the cleanest taskbar, set the first four settings off:
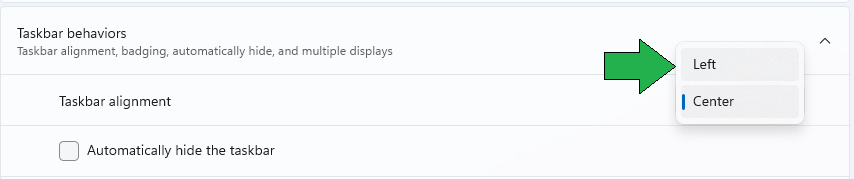
6. Scroll down and expand the Taskbar behaviors section. Change alignment to "Left" which will make the taskbar look more like Windows 10. Most of the other settings can be left as is according to your preferences.
Here is a link to an article that goes into more depth of customizing the look of Windows 11 to look more like Windows 10.
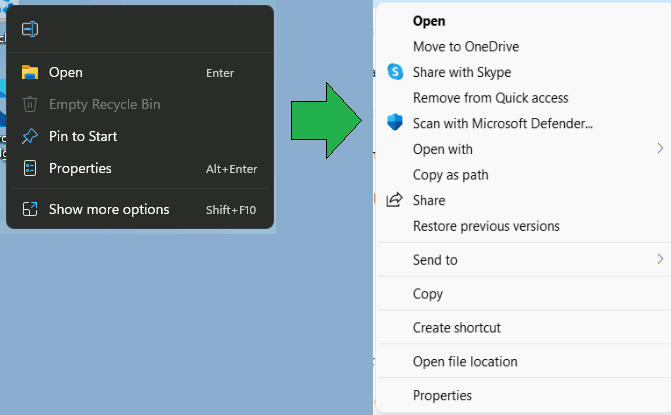
Optional: Use the full context menu (right-click menu)
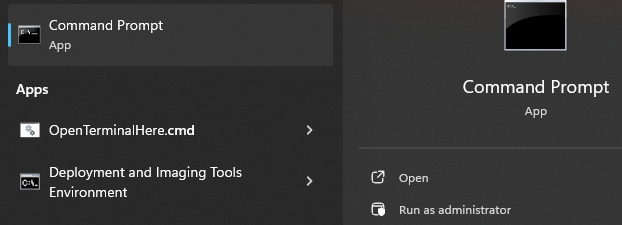
2. The copy/paste the following command and press enter:
reg.exe add "HKCU\Software\Classes\CLSID\{86ca1aa0-34aa-4e8b-a509-50c905bae2a2}\InprocServer32" /f /ve3. Then log out and back in for the change to take effect:
Other Optional Adjustments
I've found a couple of online articles to help reduce ads, bloat, and other unwanted things in Windows 11. Always be careful with third-party instructions and software: